
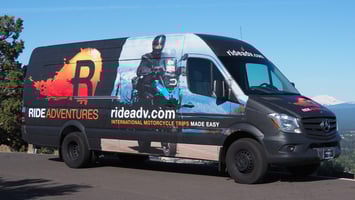
As we explained in Part 1 of this article series, our need was to have electricity available from the RIDE Adventures Sprinter Van so that we can keep showing you all the great photos & videos, powering air compressors, and charging smartphones at the motorcycle rallies and different events we’ve been meeting you at. Haven’t seen the van in person yet? Ask which event we’re going to next, and we’ll see you there!
 So, Part 1 covered the challenge, and a few options that were “ruled out” due to their extreme inconvenience, cost, and overall downsides. This “research” phase eventually led us to a decision to install a set of semi-permanent solar panels on the roof of the van, such that the ultimate in convenience, eco-friendliness, and we believe long-term cost-savings, was achieved.
To get started on a solar panel install means you should know some things about your specific situation, in order to actually start ordering the panels and pieces you need. We had great success and just what we needed after contacting the folks at SolarDealz, but again, it’s important to know and think about these points before even contacting them:
1) Know Your Vehicle – Obviously, it’s important to know the size, dimensions, surfaces, etc. of the vehicle Know which vehicle you’re going to install solar on. What is the rooftop surface like: Is it flat, ribbed, convex, etc.? How much total space is available? Can you drill through to an interior surface to fasten panels? Are there reasonable ways to get through the roof with wiring, and down to what will probably be a battery bank for storing the power? Look at our install job and search around the internet first, to get an idea of what’s possible for your vehicle.
2) Know Your Power Needs - In other words, figure out which TV’s, refrigerators, laptops, compressors, tools, water heaters, or whatever you’ll be using, and do the research online to figure each item’s power needs are. Each device should have a Wattage or Amperage draw that, when all combined together will summarize your overall power needs. Be ready with this information before taking the next step below, and it might help if you ‘prioritize’ this list of power needs in order of certainty that you’ll be using each item. (NOTE: It’s important to make notes about how long you’ll be using each item per day, week, or whatever. Power needs are measured in terms like “Amp Hours,” so again, the duration of use is important.)
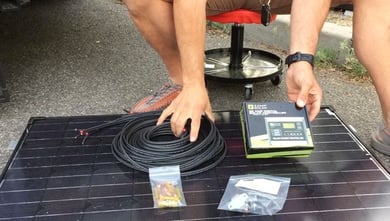 3) Contact www.SolarDealz.com - Whether you’ve already figured how much solar power is needed or not, you’re best off double-checking the strategy with SolarDealz, as they are an excellent source for competitive pricing on top-quality products and service anyway. Please note, this is not a paid advertisement and we have no affiliation with them, but instead just a sincere suggestion on how to put this entire system together affordably, sufficiently, and accurately the first time.
NOTE: As part of your discussion with SolarDealz, you’ll need to figure out a battery storage plan for holding all the power your solar panels will absorb. We’ll touch base on what we did in Part 3 of this article series, but just to briefly explain, we installed 4 x 6 volt batteries in a parallel-series system, holding about 450 amp hours worth of power.
4) Purchase and Receive – Obviously, you’ll need to get the solar panel(s), wire & cable, controllers, etc. in your hands next. For sure you might want to shop around before committing to one provider of such hardware, but it’s unlikely you’ll find a better resource with as much knowledge on this topic than SolarDealz.
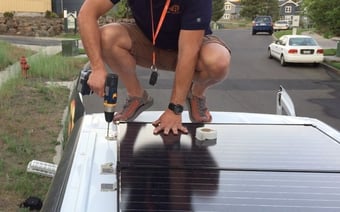 5) Get Ready for Your Install! – The real fun begins when you get to hold the power of the sun in your hands! (Well, figuratively anyway : ) There might be some RV dealers, custom installers, and other providers nearby to do this for you, but please keep in mind the satisfaction gained from doing a job like this yourself. Unless you admit to struggling with with power tools, wiring, crimping, etc., such a project is not really difficult to complete. Plan on taking your time, thinking through each decision to drill holes or make alterations to the vehicle, all after you have “mocked up” the scenario physically, as we’ll show in the next article.
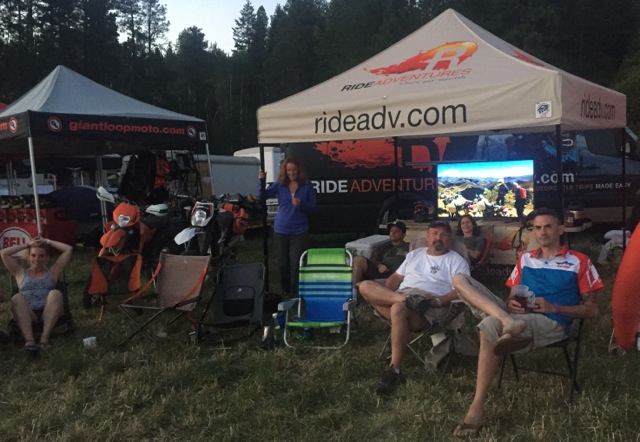
We’ll get more into the actual installation challenges and such that we encountered in the next blog post, which will be Part 3 on this topic. Up to this point though, we hope this is information you’ve found useful. It sure has worked out well for us! -- Below, enjoy a shot of how good the 55" LED Television looks around some riding friends as the night time falls during the 2015 NW Overland Rally.
SEE PART 1 OF THIS ARTICLE SERIES ABOUT SOLAR PANEL INSTALLATIONS ON THIS LINK
And, don't forget, if you're going to be hauling around your toys, you may need to brush up on your adventure riding gear list.